How to Patch Drywall - Plaster Repair
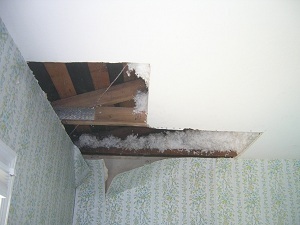
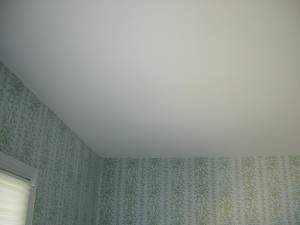
This was a hole in the drywall ceiling caused by a leak in the roof—the perfect situation to showcase a drywall plaster wall repair job. When learning how to patch drywall, the very first thing to do is to cover everything with plastic, and I mean everything! Plaster dust gets everywhere.
Wear a mask when doing this plaster repair procedure, and I mean ALL the way through it, especially when you're cleaning up, cutting the drywall, or sanding the joint compound. If you don't, you're asking for respiratory problems!
There was also blown-in insulation in the attic coming out. You can use that new biodegradable green "plastic." It dissolves into natural substances in landfills (cool!).
Nothing had been done on the leak for a while, so there was mold on the wall behind the wallpaper (and on the drywall up in the ceiling, of course.) The first thing I did was pull the wallpaper down as far as I could to expose all of the mold.
The next thing to do to fix this awful hole in the drywall is to cut the plaster board back to the joists in square or rectangular shapes with a drywall. It is VERY IMPORTANT that you make sure that the remaining plaster board is still attached HALFWAY on the joist. Cut it back with the drywall saw and cut it over the joist with a utility knife. You may have to reinforce the remaining plaster board attachment to the joist with drywall nails or screws. The reason this is so important is that you will need the other half of the joist to nail the new drywall to.
There was insulation above the drywall in this particular spot and so I saved it off to the side in a pile to put back while repairing it.
The next step is to cut the drywall. Make sure it's the right size. It's usually a half inch in thickness, but it can also be three-quarters of an inch. Measure the square holes you made between the joists and then map that out with a square on a piece of drywall. The trick with cutting drywall is that you cut one side with a knife, break it, and then run your knife along the 'V' made underneath the break.
Please cut away from (not towards) any part of your face or body.
Nail up your plaster board pieces with drywall nails.
The next step will be taping. Try to make it so that the pieces share equal space on the joist. When you nail it all together, make it is tight as possible. As long as the board is nailed up tight, there can be gaps as much as a quarter inch because the drywall tape will cover it.
Drywall taping happens in three stages, with sanding (with a drywall sanding sponge) between each stage.Keep in mind that every one of these stages has to dry completely (overnight) in order to do the next one. You need plastic all around and underneath where you're working because you'll be swinging joint compound everywhere. When you sand, the dust will get everywhere. Wear a hat unless you want a lot of mud and dust in your hair.
The first stage involves laying a fine layer of joint compound over the seams in the plaster board, then pressing the drywall tape into it with a taping blade.
The next stage is another fine layer of joint compound that covers the tape. There has to be enough compound over the tape to sand it smooth, but not enough to expose the tape itself (you can a little bit.) The key here is fine layers. Don't make it too thick, or it will take too long to dry and probably crack or end up looking lumpy.
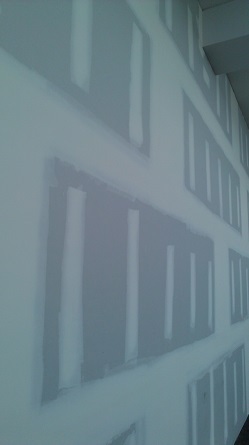
The final stage is an even finer layer that's more spread out over the drywall. It should be enough so that when it's sanded, it blends with the flat surface of the drywall and the tape is completely hidden. I only took before and after pictures of this job; the picture below is from the mall. I was walking by when I noticed this beautiful pro taping job:
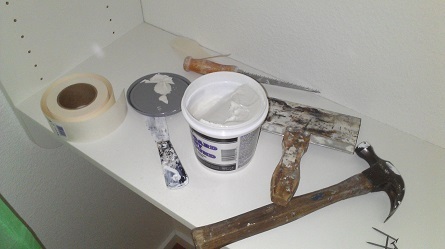
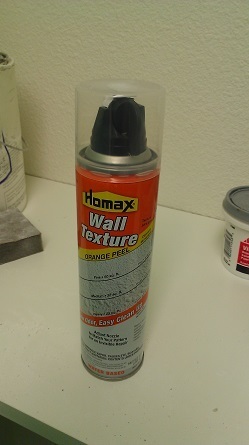
The best way to texture your repair is to get the Homax spray texture product (you can follow the links below) for the texture you are going for. It's easy and fun. You just spray it on and then smooth it down with the taping blade, (or not, depending on the texture.) You may want to practice on a different board to to match the texture that is on there already.
An essential trick when you're doing drywall work is to run your eyes underwater when you're done. Flush your eyes out with running water, moving your eyelids around to get all the dust out. Otherwise, you might get an eye infection, or at least some serious discomfort.
On this particular job, at the end, I had to clean the mold off the back of the wallpaper with strong detergent and then glue it back to the wall with wallpaper paste.
I have used this Drywall sanding sponge by 3M; it works well and lasts a long time:
3M Large Area Drywall Sanding Sponge, Fine/Medium, 4.875-Inch by 2.875-Inch by 1-Inch